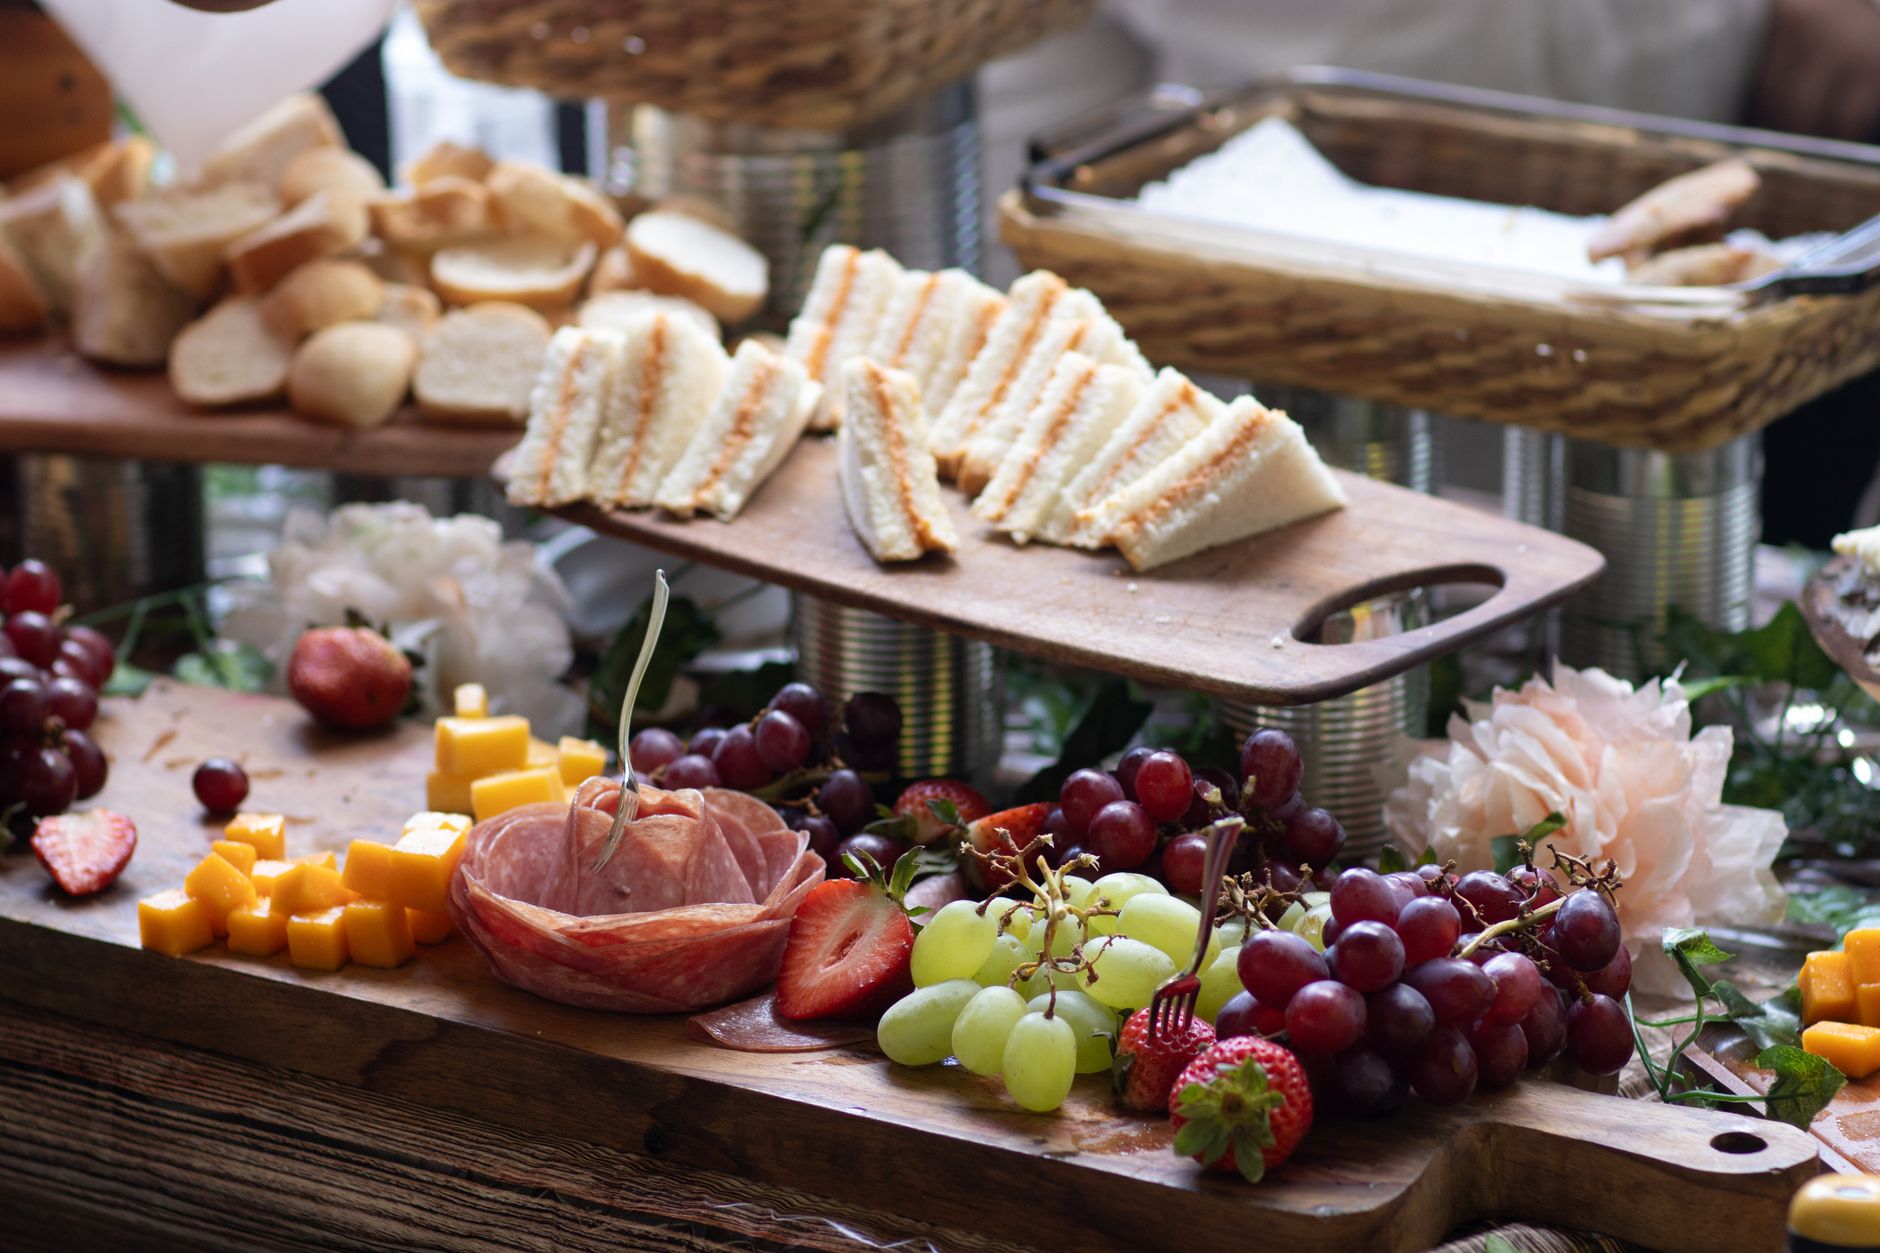
How to fold salami into a rose shape for a viral party platter?
You’re hosting a gathering, you’ve spent hours perfecting your menu, and everything tastes incredible. But when your guests arrive, what’s the first thing they see that makes them reach for their phones? Often, it’s those unexpected, visually stunning details that transform a good party into a truly memorable one. Imagine a platter so beautiful, it looks like a work of art.
Best salami types for roses
The foundation of any beautiful salami rose is, naturally, the salami itself! Choosing the right type is crucial for both ease of folding and the final aesthetic. For the easiest and most elegant roses, you’ll want thinly sliced, flexible salami. Here are a few recommendations:
- Genoa Salami: This is often the go-to for its classic flavor and pliable texture. Look for slices that aren’t too thick, usually found in the deli section or pre-packaged.
- Hard Salami (thinly sliced): While called “hard,” when thinly sliced, it still offers enough flexibility. It brings a robust, savory flavor that many guests enjoy.
- Pepperoni: For a spicier, more vibrant option, especially popular on casual platters or even pizza-themed boards. Ensure it’s the standard, larger deli-style pepperoni, not the small, cup-and-char kind.
- Prosciutto (very thin): While not technically salami, ultra-thin prosciutto can also be used for a more delicate, light pink rose, though it requires a gentler hand due to its fragility.
Avoid very thick-cut salami or those with extremely coarse textures, as they will be difficult to fold and maintain their shape.

Step-by-step folding technique
Ready to create some edible masterpieces? This salami rose shape folding technique is surprisingly simple once you get the hang of it. You’ll need a wine glass or a small, round bowl for support.
*(Video embed: Quick tutorial demonstrating the salami rose folding technique using a wine glass)*
*(Image: A collage showing steps 1-6 of folding a salami rose, from draping slices to the final reveal)*
Here’s how to fold salami roses that will wow your guests:
- Prepare Your Workspace: Grab a clean wine glass (a standard-sized red wine glass works well) or a small, round bowl with an opening of about 2.5 to 3 inches. This will be your mold.
- First Layer – The Core: Take your first slice of salami and drape it over the rim of the glass. Position it so about half of the slice hangs over the inside of the glass and half over the outside. The goal is for the top edge of the salami to just peek over the rim.
- Second Layer – Overlap and Repeat: Take your second slice. Overlap it slightly with the first slice, typically about a quarter to a third of the way. Drape it over the rim, just like the first. Continue this process, overlapping each subsequent slice by about one-quarter to one-third, working your way around the entire rim of the glass. You’ll typically use 4-6 slices for the first full layer, depending on the size of your salami.
- Building the Rose – Second and Third Layers: Once you’ve completed a full circle, start your next layer. This time, position the slices *slightly lower* than the previous layer, letting them overlap the gaps between the first layer’s slices. This creates a fuller, more natural rose petal effect. Continue overlapping as before. For a small rose, 2-3 layers are usually sufficient; for a larger, fuller rose, you might do 4 layers.
- Compacting the Rose: Once you’re happy with the fullness of your rose, gently press down on the center of the salami, pushing it into the glass. This helps to compact the layers and secure the base.
- The Reveal: Carefully invert the glass over your serving platter. Give it a gentle tap or two, and the salami rose should gracefully slide out. Adjust any petals as needed to achieve your desired look.
And just like that, you’ve mastered the art of how to fold salami roses! Repeat the process for as many roses as your platter needs.
Pro tips for perfect results
Want your salami roses to truly shine? Keep these expert tips in mind:
- **Use a Good Quality Glass:** A wine glass with a slightly wider, but not too wide, rim provides the best support and shape.
- **Maintain Consistent Overlap:** Aim for roughly the same amount of overlap (about 1/4 to 1/3) for each slice. This creates an even, symmetrical rose.
- **Don’t Overstuff:** While you want a full rose, don’t try to cram too many layers or slices into the glass. This can make it difficult to release and compromise the rose’s structure.
- **Chill Your Salami:** Slightly chilled salami is firmer and easier to handle than room temperature salami, which can be too flimsy.
Troubleshooting common mistakes
Even seasoned entertainers encounter hiccups. Here’s how to tackle common issues with your salami rose hack:
- Rose isn’t holding its shape:
Cause: Not enough layers, slices are too thick, or not pressed firmly enough into the glass.
Fix: Use 4-6 slices per layer and ensure you press the completed rose gently but firmly into the glass before inverting. Try a thinner cut of salami next time.
- Slices are tearing or breaking:
Cause: Salami is too cold and brittle, or too warm and flimsy, or simply poor quality/too thin for its texture.
Fix: Let your salami sit at room temperature for 5-10 minutes to become more pliable, but don’t let it get too warm. If it’s consistently tearing, try a different brand or type of salami.
- Rose won’t release from the glass:
Cause: The rose is too tightly packed, or the glass rim isn’t clean.
Fix: Gently wiggle the glass while holding the rose’s base to loosen it. Next time, don’t pack quite as tightly, and ensure the glass rim is dry and clean.
- Rose looks lopsided or uneven:
Cause: Inconsistent overlapping of slices or uneven pressure when building layers.
Fix: Pay closer attention to the overlap amount with each slice. Try to maintain a consistent height and spacing as you go around the rim. Practice makes perfect!
Plating and presentation ideas
Once you’ve mastered the salami rose shape folding technique, it’s time to show them off! These edible blossoms are a fantastic focal point for any party platter salami decoration.
- **The Classic Charcuterie Board:** Arrange your salami roses as the centerpiece of a beautiful charcuterie board. Surround them with an assortment of cheeses (hard, soft, crumbled), fresh and dried fruits (grapes, figs, berries, apricots), nuts, olives, crackers, and crusty bread.
- **Veggie Platter Embellishment:** Elevate a simple vegetable platter by placing a few salami roses amidst crisp carrots, cucumbers, bell peppers, and cherry tomatoes. It adds a touch of sophistication and protein.
- **Breakfast/Brunch Boards:** Who says charcuterie is just for evenings? Add salami roses to a brunch spread alongside mini quiches, croissants, fruit, and yogurt parfaits for an elegant touch.
- **Individual Appetizers:** For a more controlled presentation, create mini salami roses (using smaller glasses) and place one on a cracker with a dollop of cream cheese or a small cube of cheddar.
- **Variations Beyond Salami:** Don’t stop at salami! This technique also works beautifully with thinly sliced turkey, ham, or even smoked salmon for different flavor profiles and color palettes. Imagine a “bouquet” of different meat roses!
Make-ahead and storage tips
Hosting can be stressful, but these salami roses don’t have to be a last-minute scramble. You can certainly make them ahead of time!
- **Making Ahead:** Prepare your salami roses up to 2-3 hours before your event. Arrange them on your serving platter, then cover the entire platter loosely with plastic wrap.
- **Chilling:** Store the covered platter in the refrigerator. The cool temperature will help the roses hold their shape.
- **Serving:** Remove the platter from the refrigerator about 15-20 minutes before serving to allow the salami to come to a slightly warmer temperature, enhancing its flavor and texture.
- **Longer Storage:** While technically safe for longer, salami roses are best enjoyed within a few hours of assembly for optimal appearance and freshness. If you need to prepare ingredients earlier, pre-slice your salami and keep it refrigerated, then fold the roses closer to serving time.
Frequently Asked Questions
What type of salami works best for making roses?
The best salami types are thinly sliced and flexible, such as Genoa salami, thinly sliced hard salami, or even standard deli pepperoni. Look for slices that aren’t too thick and can drape easily over a wine glass rim without tearing.
How long does it take to fold a salami rose?
Once you get the hang of the technique, a single salami rose can be folded in less than a minute. For a larger platter with multiple roses, you can typically create a dozen in about 10-15 minutes, depending on your speed and the complexity of your arrangement.
Can I make salami roses ahead of time?
Yes, you can! Salami roses can be made 2-3 hours in advance. Arrange them on your serving platter, cover loosely with plastic wrap, and refrigerate until about 15-20 minutes before you plan to serve. This allows them to chill and firm up, maintaining their beautiful shape.
What’s the trick to getting the rose to hold its shape?
The main trick is using consistent overlap for your slices, building enough layers (typically 2-4 layers for a full rose), and gently but firmly pressing the completed rose into the glass before inverting. Chilling the finished roses in the refrigerator also helps them maintain their structure.
With this simple salami rose hack, you’re well on your way to creating stunning, memorable party platters that look as good as they taste. Impress your guests and elevate your entertaining with these beautiful, edible blossoms!











