How to Properly Shuck an Oyster: A Step-by-Step Guide
Shucking an oyster may seem like a daunting task, but with the right technique and a bit of practice, you can become an expert in no time. Follow this step-by-step guide to learn how to shuck an oyster like a pro.
Step 1: Gather Your Tools
Before you begin, make sure you have all the necessary tools. You will need a sturdy oyster shucking knife, a clean towel, and a glove to protect your hand from any slips.
Step 2: Secure the Oyster
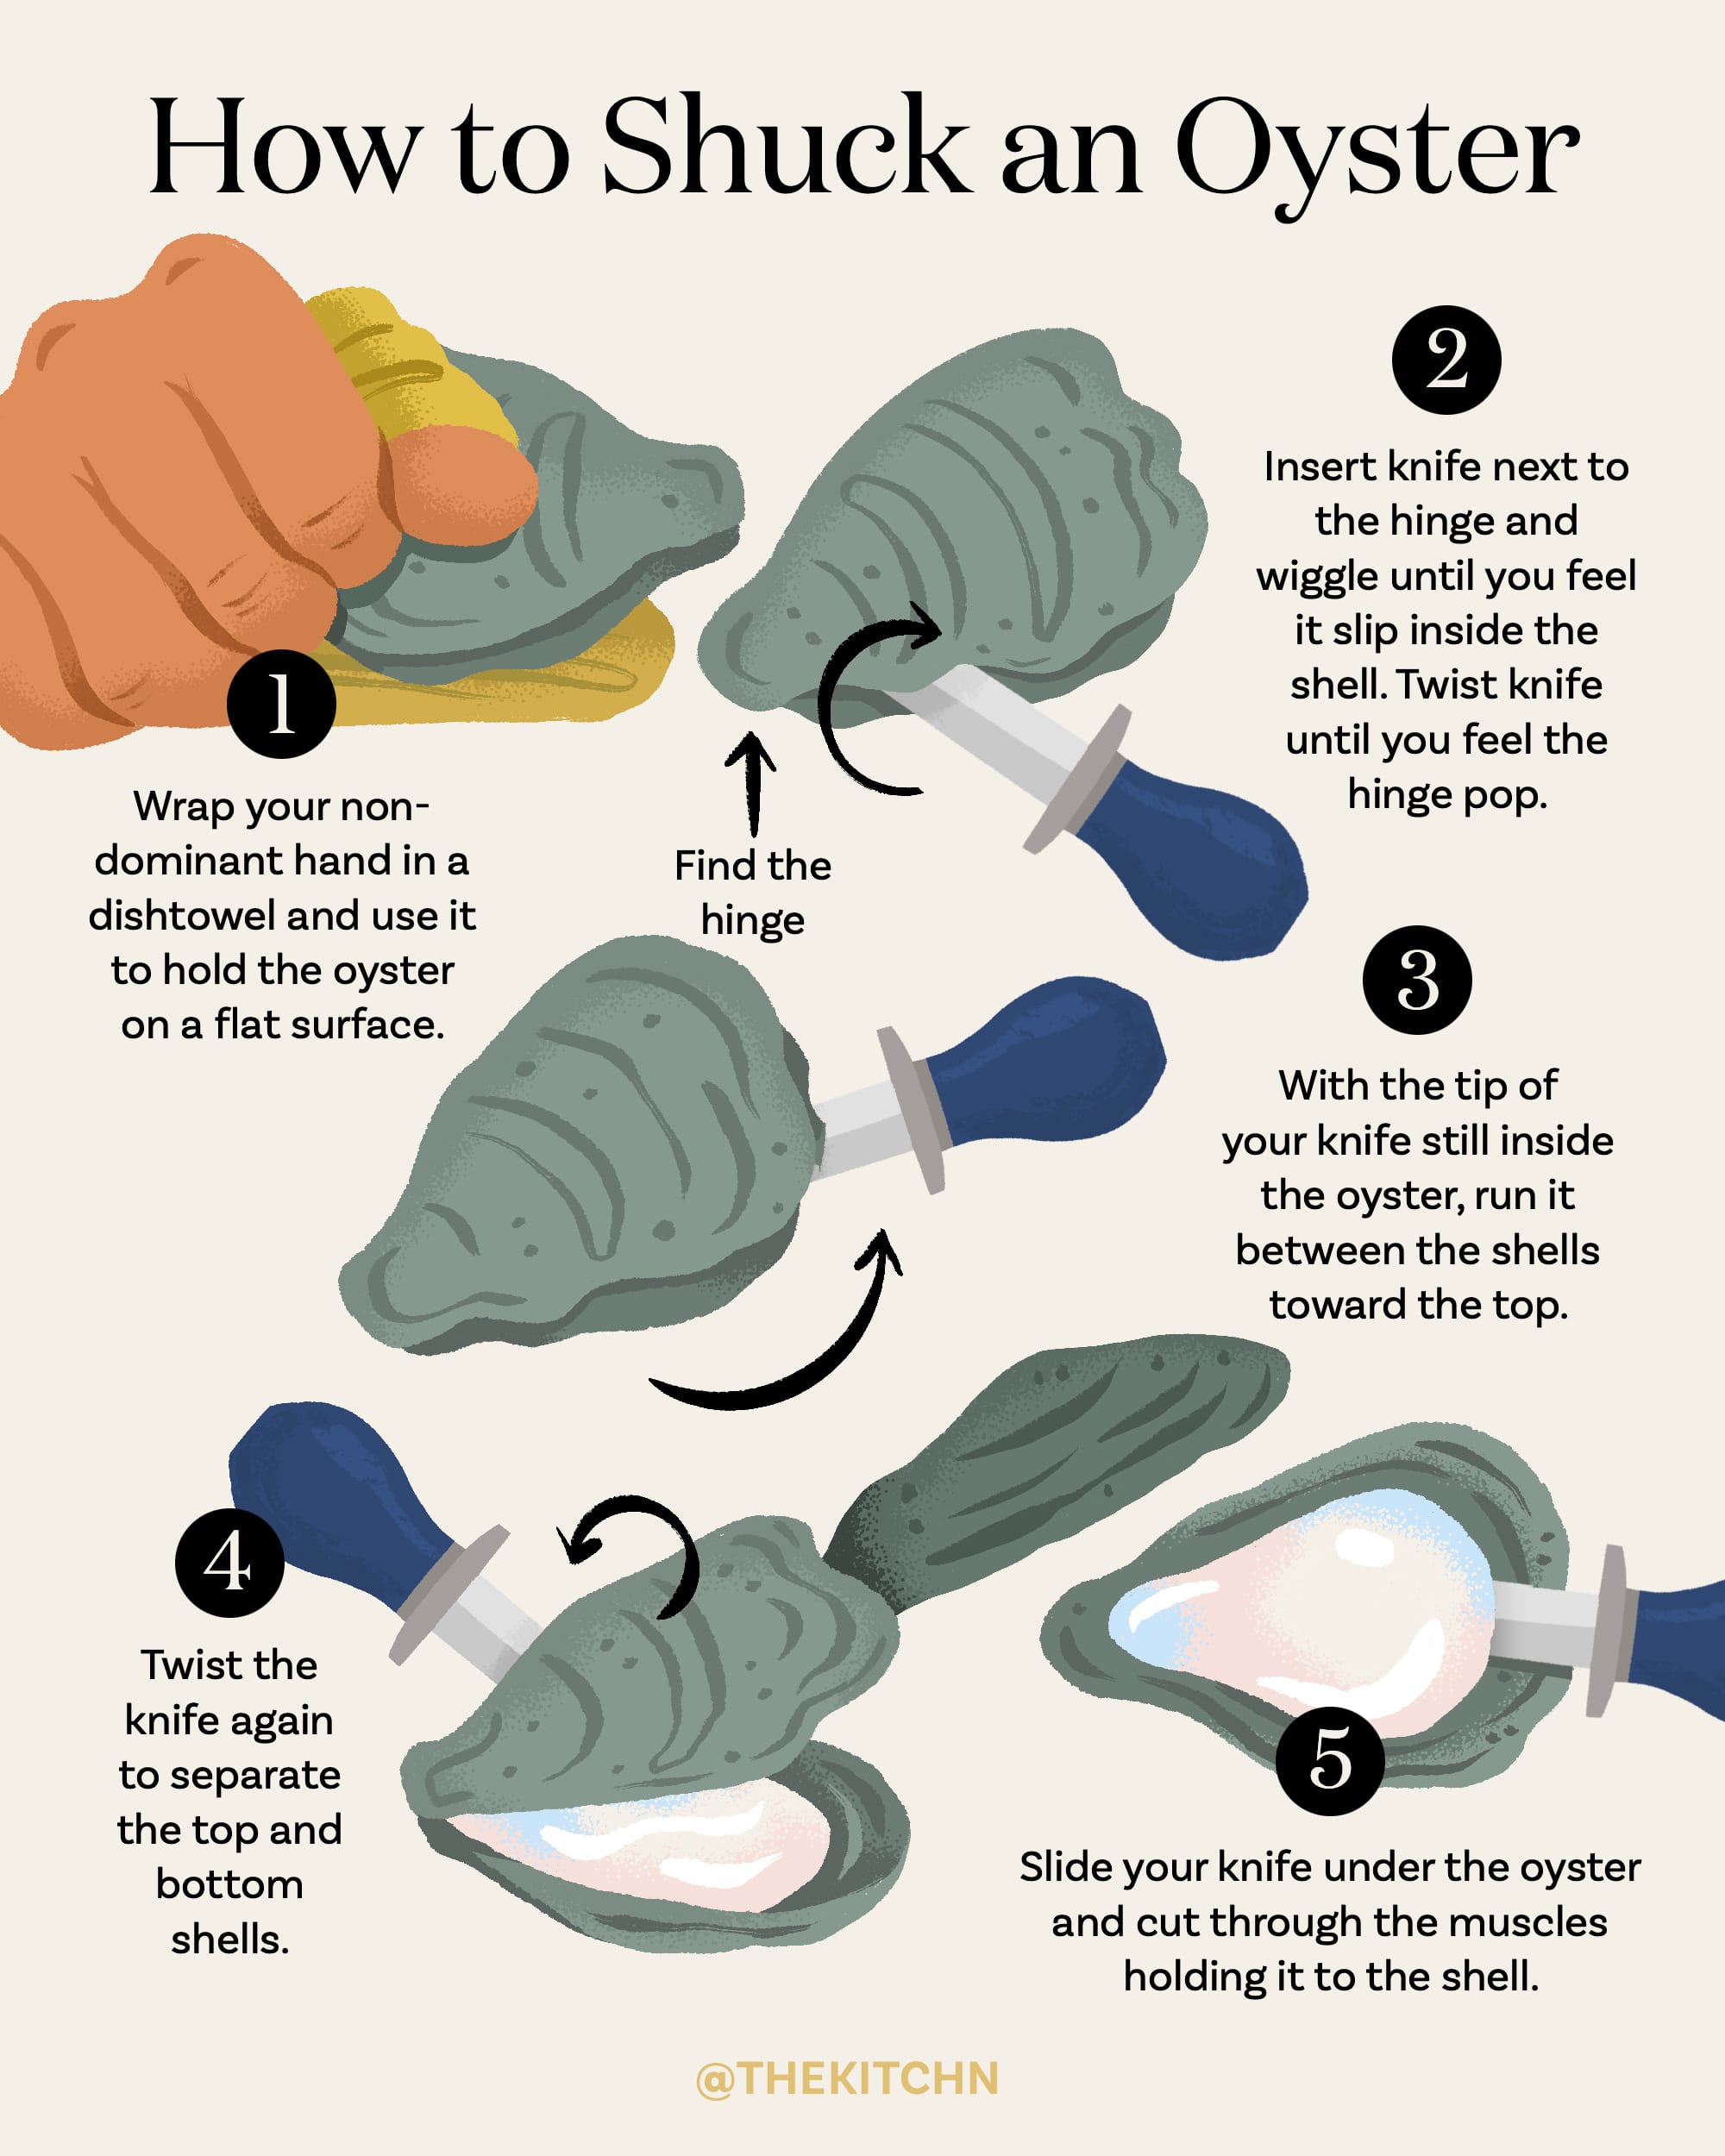
Hold the oyster firmly in one hand, flat side up, using the towel to protect your hand. Locate the hinge of the oyster, which is the pointy end where the two shells meet.
Step 3: Insert the Knife
Insert the tip of the oyster shucking knife into the hinge of the oyster, making sure to angle the knife slightly upward to avoid piercing the oyster meat inside.
Step 4: Twist the Knife
Gently twist the knife to pry open the oyster shell. Once you feel the knife penetrate the hinge, slide it along the top shell to detach the muscle that connects the two shells.
Step 5: Remove the Top Shell
Once the top shell is detached, carefully remove it and set it aside. Be sure to keep the oyster level to prevent spilling any precious oyster liquor.
Step 6: Release the Oyster
Scrape the knife underneath the oyster to release it from the bottom shell, being careful not to spill any of the juices. Check for any shell fragments and remove them before serving.
Step 7: Serve and Enjoy!
Place the freshly shucked oyster on a bed of ice and garnish with lemon wedges or your favorite sauce. Enjoy the fruits of your labor!
With these simple steps, you can shuck an oyster with ease and impress your friends and family with your newfound skills. Practice makes perfect, so don’t be discouraged if it takes a few tries to master the art of shucking.











